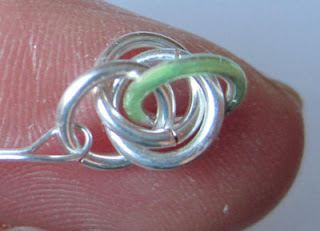
Laitan tähän omalle sivulleen ohjeen piina 5:n aloituksesta. Tässä siis jokainen rengas menee viiden muun renkaan läpi. Samalla periaatteella voi tehdä vaikka piina 7:aa tai yhdeksää, jos haluaa menettää mielenrauhansa lopullisesti.
Kaksi perusasiaa: pidä aluksi tiukasti kiinni, renkaitten järjestys sekoaa vielä helpommin kuin 3 versiossa. Kuudenteen renkaaseen pääseminen helpottaa tilannetta.
Tekemisen tekniikka perustuu ketjun kääntämiseen akselinsa ympäri. Tässä olen kääntänyt ketjua aina ylöspäin (tai poispäin) pitäessäni ketjua vasemmassa kädessä. Kääntämissuunta kannattaa pitää vakiona.
Olen merkinnyt kuviin väriä niihin renkaisiin joihin kulloinkin kannattaa kiinnittää huomiota.
Esimerkki tehty 1mm langasta 4,5 veivillä. (AR 4,5)
Welcome to start making the Jens Pind 5 where each ring goes through five other rings. With the same technique you can do even a 7 or 9 Jens Pind, if you want to loose the peace of your mind totally.
Two basic things to remember: do hold onto the chain when you start. It is very easy to loose the order of the rings, and if you drop it, it may be easier to start from the beginning. After the sixth ring the chain starts to be stable.
The technigue is based on rotating the chain. Here I have rotated the chain upwards or away from myself when holding the chain in my left hand. It is wise not to change the direction of rotation.
I have put some color only on the rings you need to pay attention to.
Examples were made from a 1mm wire, AR 4,5
 |
1. Aloita suljetulla renkaalla johon laitat ohuen langan. Se
auttaa pitämään kiinni aloituksesta.
Start with attaching a thin wire to a closed ring. It helps you
to keep onto the beginning. |
|
 |
2. Pujota kaksi seuraavaa rengasta toistensa läpi.
Käännä ne samansuuntaisesti.
Attach two more rings through each other, and turn them in
the same direction. | |
|
 |
3. Käännä aloitusrengas ylös ja eteen kuvan osoittamalla
tavalla.
Flip the starting ring upwards and to the front of the two other
rings as shown. |
 |
4. Lisää neljäs rengas kaikkien kolmen edellisen renkaan läpi.
Attach the fourth ring through the previous three rings. |
|
 |
5. Käännä toinen ja neljäs viimeinen rengas ylös.
Näet aukon, joka kuvassa on merkitty sinisellä pisteellä.
Seuraava, viides rengas lisätään pisteellä merkityyn kohtaan.
Flip the second and the fourth ring upwards to see an
opening. The opening is here marked with a blue dot.
Add the fifth ring through the marked opening. |
|
 |
6. Viides rengas paikoillaan.
The fifth ring in its place. |
 |
7. Käännä kolmas ja viides rengas ylöspäin ja näet aukon,
joka kuvassa on merkitty sinisellä pisteellä. Lisää kuudes
rengas merkittyyn kohtaan. Samalla kierrät koko ketjun
aloitusta poispäin itsestäsi löytääksesi oikean paikan.
Se käy melkein itsestään.
Flip the third and fifth ring upwards to see the opening here
marked with the blue dot. Add the sixth ring in the marked
spot.You will notice that you will be quite naturally rotating
the whole chain when turning the rings enough to find the
right opening. |
 |
8. Kuudes rengas paikoillaan. Huomaa että se on asettuu
samansuuntaisesti toisen renkaan kanssa. Jos laitoit kuudennen
renkaan väärään kohtaan renkaat eivät asetu samoin.
The sixth ring in it´s palce. Notice that the rings start to align
in the same way. If they do not, you added the sixth ring
in the wrong place. |
|
 |
9. Jatka ketjua kääntämällä aina viimeinen ja kolmanneksi
viimeinen rengas ylöspäin. Joudut samalla kääntämään
koko ketjua itsestäsi poispäin. Löydät aina samannäköisen
kohdan kuin aiemminkin, tässä jälleen merkittynä sinisellä
pisteellä.
Muista tehdessäsi tarkistaa riittävän usein että renkaat
asettuvat samansuuntaisesti vierekkäisten renkaiden kanssa.
Continue the chain by always flipping s the last and the
thirdly last ring upwards. At the same time you will need
to rotate your chain upwards (or away from you). You will
always find the opening that looks the same as the previous
ones, here marked with the blue dot.
Remember to check the alignment of your rings frequently!
|


